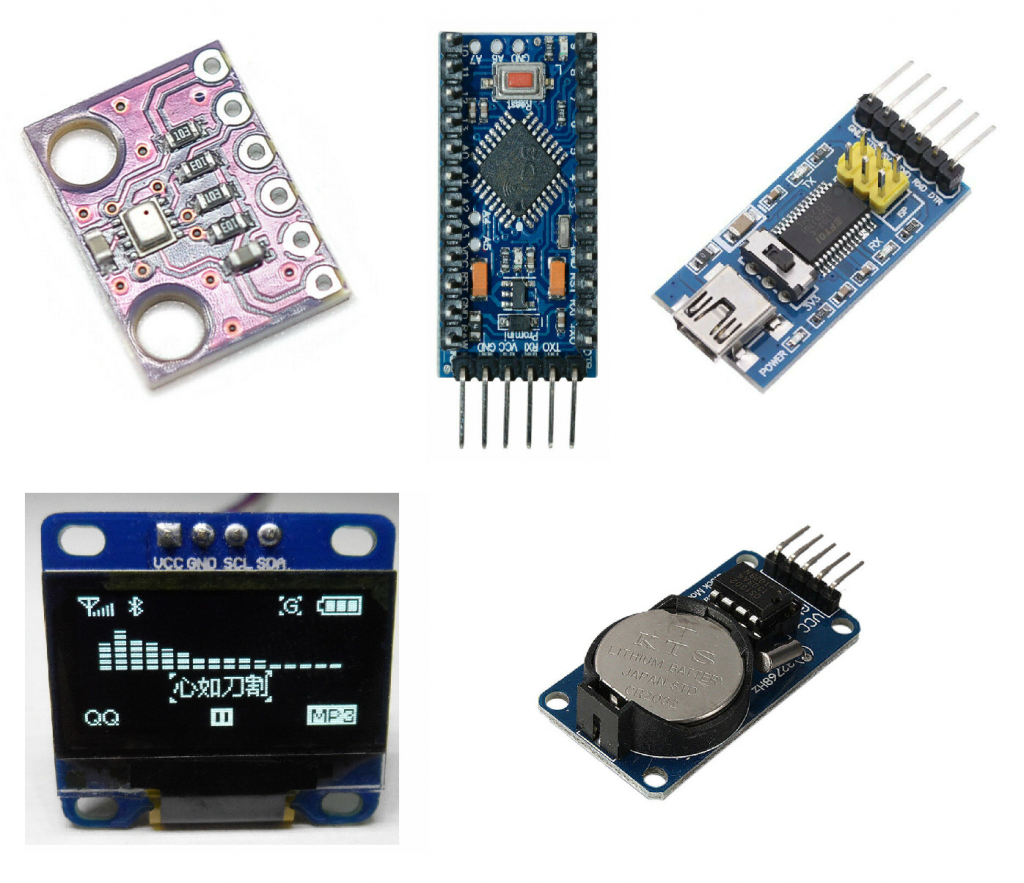
Today I’m beginning a new project: a desktop clock with a oled screen to tell time and temperature. This will be my first solo project. I have some basic Arduino and soldering experience thanks to an engineering course where my team and I built a mini sumo bot. We did not come in first place.
Design:
- Primary – An OLED display will read the time and local temperature. Two push botton switchs will be installed to advice the hour and minute values to adjust for time change. Two AA batteries will give me a 3V power supply. A toggle power switch will kill the device to save battery if needed.
- Secondary – If not too troublesome, the display will also add readouts for pressure and humidity. Blinkenlights will be added to alert if sudden pressure changes indicate possible weather events or failing that just to look cool
Parts List:
- 2x AA Batteries
- 1x Double AA battery holder
- 1x Power toggle switch
- 2x Push Button switch
- 1x DS1302 clock module board
- 1x BME280 atmospheric sensor board
- 1x 0.96 inch 128×64 white OLED display
- 1x Arduino Pro Mini, 3.3V version with an ATmega328
- Lengths of wire to connect everything
- Nylon standoffs to assemlbe the boards into a contiguous unit
- Solderable breadboard
Procurement:
Most of the boards were sourced from the lowest unit cost seller on eBay. I began planning this project several months ago, but it took until today to finally receive all of the components.
The DS1302 comes pre-attached to a board with a coin cell battery. The Arduino Pro Mini requires a breakout board to program, so be sure to grab one (or three) of those as well. I wound up with three as the first one I ordered took nearly three months to arrive. I purchased two additional breakouts to avoid the long wait should the first one be dead on arrival. That said, eBay is your best friend so long as you don’t mind using knock off parts and you’re willing to buy more than one of each component.
Adafruit has arduino libraries for all of the modules. I imagine there will be considerable searching and hand wringing involved in making everything work together but this is a learning experience (for me) so that’s part of the “Fun“.
The Plan:
- Protoype wire up each component via SPI and breadboard. I am still new to SPI and I2C, but it seems like it is quite difficult to wire more than one distinct module via I2C
- Get each component to talk to the Arduino, this is where finding and parsing the Adafruit libraries comes in
- Clean up Arduino code and streamline, here I hope to take only the most relevant bits from Step 2 and rewrite the whole program from scratch. The 3.3V Pro Mini only has an 8Mhz processor so finding the right balance between polling the atmospheric sensor and clock will be vital
- Solder and screw the components together permanently, final assembly of the clock proper. I plan to solder the Arduino Mini to the breadboard to give me a better connection point for the standoffs, as well as provide mounting points once I have the printed case ready
- Design the case, once I have the final clock assembly, I can draw up an enclosure and have it printed. – OR – Build the case, once I have the final clock assembly, I can build a clear plexiglass enclosure because who doesn’t like seeing all the bits of their first creation
I fully anticipate deviations from The Plan, but I suppose that’s design for you.